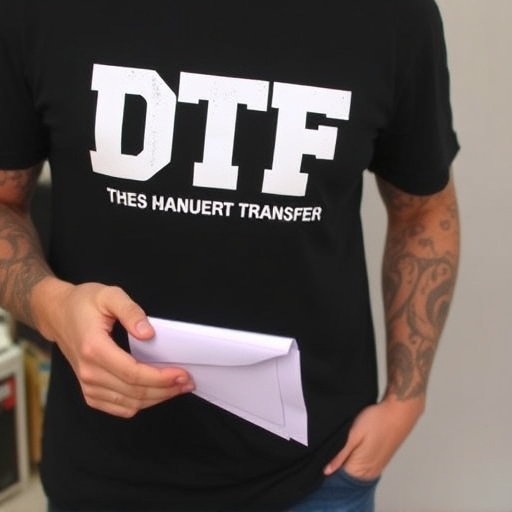


Direct-to-Film (DTF) printing is a revolutionary process for designers and manufacturers, offering precise color reproduction, swift production times, and direct communication with final products. Essential tools and materials include high-quality printers, vibrant DTF inks, cutting tools, suitable substrates, and accessories. Designing DTF involves artistic vision and technical expertise to create seamless visual translations onto film stock, optimizing image resolution, exposure, and development for unique effects. Substrate selection, ink choice, workspace setup, and precision digital design are key steps before printing. Post-printing techniques like heat treatment and layering elevate the aesthetic appeal of DTF artworks.
Unleash your creativity with personalized direct-to-film (DTF) designs! This comprehensive guide explores the art of DTF printing, from understanding its basics and benefits to gathering essential tools and materials. Learn about creative considerations, best practices, substrate preparation, and step-by-step techniques for crafting unique DTF artworks. Discover post-printing enhancements to elevate your creations. Master DTF and revolutionize your design process today!
- Understanding Direct-to-Film (DTF) Printing: Basics and Benefits
- Gathering Essential Tools and Materials for DTF Design
- Designing for DTF: Creative Considerations and Best Practices
- Preparations Before Printing: Substrates, Ink, and Setup
- Step-by-Step Guide to Creating Personalized DTF Designs
- Post-Printing Techniques: Enhancing and Finishing Your DTF Artworks
Understanding Direct-to-Film (DTF) Printing: Basics and Benefits

Direct-to-Film (DTF) printing is a cutting-edge technique that allows for the creation of high-quality, personalized designs directly on various surfaces, including glass, metal, wood, and more. This innovative process eliminates the need for traditional intermediate steps like film positives or masking, making it an efficient and versatile option for designers and manufacturers alike.
The benefits of DTF printing are numerous. It offers exceptional accuracy in color reproduction, ensuring that designs maintain their vibrancy and detail when applied to different materials. Additionally, DTF printing enables faster production times, as there’s no need for complex setup procedures. This technology is particularly advantageous for custom orders, prototyping, and short-run productions, where quick turnaround times are essential. Moreover, DTF allows for direct communication between designers and end products, resulting in precise and visually stunning final outputs.
Gathering Essential Tools and Materials for DTF Design
To embark on your journey of crafting personalized direct-to-film (DTF) designs, there are certain essential tools and materials you’ll need to gather. Firstly, invest in high-quality printing equipment suited for DTF methods, such as a reliable printer capable of handling various media types. Additionally, procure crisp and vibrant inks specifically designed for DTF applications, ensuring they align with your desired color palette.
Don’t forget the importance of precision cutting tools—a craft knife or vector cutter will enable you to meticulously trim and shape your designs. Gather a variety of substrates suitable for DTF printing, considering factors like texture, durability, and intended use. Lastly, stock up on essential accessories like protective gear, cleaning supplies, and storage solutions to maintain an organized workspace and ensure the longevity of your tools and materials.
Designing for DTF: Creative Considerations and Best Practices
Designing direct-to-film (DTF) materials requires a unique blend of creativity and technical precision, as it involves translating visual concepts directly onto film stock. When creating personalized DTF designs, consider the medium’s limitations and potential. Start by understanding the desired aesthetic, whether it’s a vintage look or a modern, high-contrast effect. This guides your color choices, contrast levels, and overall composition.
Best practices include optimizing image resolution for seamless reproduction on film, ensuring proper exposure to avoid overexposure or underexposure, and playing with different development techniques to achieve unique effects. Incorporate texturizing elements, fine lines, or subtle imperfections to give your design a handmade quality that can enhance the overall cinematic feel. Remember, less is often more in DTF design—let the film’s grain and texture become part of the narrative.
Preparations Before Printing: Substrates, Ink, and Setup
Before diving into the printing process for your personalized direct-to-film (DTF) designs, there are several crucial preparations to ensure optimal results. The choice of substrate is a key factor; consider the type of material you want to print on, whether it’s vinyl, canvas, or even wood, as each offers unique properties and applications. Ensure you have the appropriate substrate for your desired outcome, as this will impact the final product’s durability and appearance.
Ink selection is another vital step. DTF printing typically uses eco-friendly, solvent-based inks that provide vibrant colors and sharp details. Invest in high-quality ink compatible with your printer to achieve superior prints. Additionally, setting up your workspace and equipment is essential. Calibrate your printer and ensure it’s ready for the specific requirements of DTF printing. Have all necessary tools at hand, including precision cutting tools if you plan to trim or finish the printed material afterward.
Step-by-Step Guide to Creating Personalized DTF Designs
Creating personalized direct-to-film (DTF) designs involves a blend of creativity and technical precision. Here’s a step-by-step guide to help bring your unique vision to the big screen. Start by gathering reference materials that reflect your desired aesthetic, from color palettes and textures to specific visual elements you want to include. Next, sketch out rough ideas on paper or use digital design software to conceptualize your design. This phase is crucial for visualizing the final product and identifying any potential issues early on.
Once satisfied with your concept, move on to the digital stage. Use professional-grade graphic design software like Adobe Illustrator or Photoshop to refine your drawing. Ensure your design elements are high-resolution and suitable for printing at scale. Pay close attention to details like line work, color accuracy, and overall composition. After finalizing your design digitally, prepare it for the DTF process by saving it in the appropriate file format (like SVG or PDF) and setting print-ready parameters.
Post-Printing Techniques: Enhancing and Finishing Your DTF Artworks
After printing your direct-to-film (DTF) artworks, the next step is to enhance and finish them using various post-printing techniques. This is where you can truly bring your designs to life and add that extra level of detail and uniqueness. One popular method is heat treatment, which allows you to cure the ink and achieve a more permanent and vibrant finish. This process ensures the colors remain rich and vivid, even when handled frequently.
Additionally, layering and blending techniques can be employed to create depth and dimension in your DTF art. By carefully applying additional coats of ink or using specialty finishes, artists can add subtle textures, glossy highlights, or matte effects. These finishing touches not only elevate the aesthetic appeal but also make each piece more distinctive, turning a simple print into a true work of art.