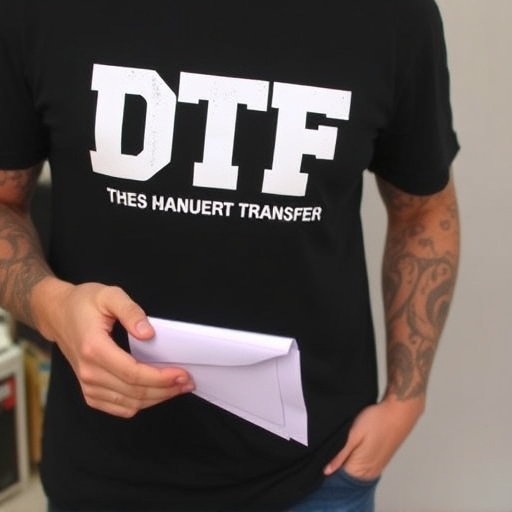


Direct-to-film (DTF) printing offers a cutting-edge method for creating personalized, high-quality designs on various materials. To start, prepare by gathering essential tools and materials, including DTF printers, inks, film, and protective gear. Design your artwork using vector graphics or high-res images, considering layout and composition. Clean the substrate surface, apply DTF coating, and dry thoroughly for optimal adhesion. Set up your exposure unit, place the designed film, expose it, and remove. Apply the DTF transfer to the cleaned substrate, press firmly, then inspect and enhance the design with post-processing techniques like sealing and adding shadows. This meticulous process results in vibrant, long-lasting DTF prints.
“Unleash your creativity with personalized direct-to-film (DTF) designs! This comprehensive guide walks you through the entire process of crafting unique DTF prints. From understanding the fundamentals of DTF transfer and printing to gathering essential tools and preparing your design, each step is meticulously detailed. Learn the art of applying coatings, exposing and developing your custom print, and mastering post-processing techniques. Create stunning DTF prints that bring your visions to life.”
- Understanding Direct-to-Film (DTF) Transfer and Printing
- Gathering Necessary Tools and Materials for DTF
- Preparing Your Design for DTF Transfer
- Applying the DTF Coating and Pre-Treatment
- Exposing and Developing Your Custom DTF Print
- Post-Processing and Final Touches for DTF Prints
Understanding Direct-to-Film (DTF) Transfer and Printing

Direct-to-film (DTF) transfer and printing is a cutting-edge technique that allows for the creation of high-quality, personalized designs directly onto various surfaces, such as t-shirts, mugs, or even walls. This innovative process involves using specialized equipment to apply inks or coatings onto the desired medium, resulting in vibrant and durable DTF prints. Understanding the intricacies of DTF transfer is key to creating unique, customized products that stand out.
The DTF process begins with designing your artwork using graphic design software. Once finalized, the design is prepared for printing by ensuring it meets the required specifications, such as resolution and color mode. The actual transfer involves a precision printer that deposits ink or coating onto the substrate, whether it’s fabric, ceramic, or another material. This direct application ensures precise detail reproduction and vibrant colors, making DTF an ideal method for creating personalized, eye-catching items.
Gathering Necessary Tools and Materials for DTF

Before embarking on your direct-to-film (DTF) design journey, it’s crucial to gather all the essential tools and materials required for a seamless DTF transfer process. This includes high-quality printing equipment, such as a DTF printer or a compatible heat press, along with specialized inks formulated specifically for DTF printing. Ensure you have access to a clean workspace equipped with proper ventilation to handle the printing process effectively.
Additionally, stock up on essential materials like DTF film, which serves as an intermediate layer between your design and the final medium (e.g., fabric, metal). Don’t forget to include precision cutting tools, cleaning solutions, and protective gear for safety during the transfer. With these necessary tools and materials in hand, you’ll be well-prepared to create stunning DTF prints tailored to your unique creative vision.
Preparing Your Design for DTF Transfer
To prepare your design for a direct-to-film (DTF) transfer, start by ensuring it meets the technical requirements of DTF printing. This means using vector graphics or high-resolution raster images with sharp outlines and minimal fill details. Avoid complex blends or gradients as they can cause issues during the transfer process. Save your design in a compatible format like SVG, EPS, or high-resolution JPEG/PNG, ensuring it’s print-ready.
Next, consider the layout and composition of your design. Since DTF prints are applied directly to a substrate, such as glass or metal, aim for a design that fits the surface without excessive negative space or elements that might interfere with the transfer. Keep text legible at the intended distance of viewing and ensure there are no sensitive or removable parts of the design that could come loose during the application process.
Applying the DTF Coating and Pre-Treatment
Applying the DTF Coating and Pre-Treatment is a crucial step in creating personalized direct-to-film (DTF) designs. Start by ensuring your surface is clean and free from any contaminants. This involves careful cleaning with suitable solvents or degreasers to prepare the material for the DTF transfer. A proper pre-treatment not only enhances adhesion but also extends the lifespan of the final print.
Once the surface is ready, apply a thin layer of DTF coating using a brush or sprayer. The coating acts as a barrier between the design and the substrate, ensuring crisp and long-lasting DTF prints. Allow the coating to dry completely before proceeding to the next step. This meticulous process forms the foundation for high-quality DTF transfers, guaranteeing that your designs are not only visually stunning but also durable.
Exposing and Developing Your Custom DTF Print

After designing your custom DTF (Direct-to-Film) transfer using specialized software, the next step is to expose and develop your print. Start by setting up your exposure unit according to the manufacturer’s instructions, ensuring optimal accuracy for the best results. Place your designed DTF film onto a clean, flat surface inside the exposure unit, aligning it precisely with the designated areas for printing. Adjust the exposure time based on the material you’re using; different materials require varying levels of UV light for effective transfer.
Once exposed, carefully remove the DTF film from the exposure unit and prepare your substrate—the object or surface where you want to apply the design. Clean it thoroughly to ensure no debris or oils interfere with adhesion. Place the DTF film onto the substrate, ensuring perfect alignment, and use a pressing tool to activate the adhesive properties of the transfer. This process involves carefully applying pressure for a set duration to guarantee a secure bond between the design and the substrate.
Post-Processing and Final Touches for DTF Prints
After creating your direct-to-film (DTF) design and applying the DTF transfer to the desired substrate, it’s time to step back and admire your work – but don’t stop there! Post-processing is a crucial stage in bringing your DTF prints to life. This involves several final touches to enhance the overall quality and ensure the design pops.
The first step is to carefully inspect the print for any imperfections or missed areas. Use a fine-toothed comb or a magnifying glass to check for gaps, smudges, or uneven application of the DTF transfer. Once satisfied with the initial inspection, it’s time for the magic – or rather, the finishing touches. This may include adding subtle effects like shadows or highlights using specialized tools or software to give your design depth and dimension. Additionally, consider sealing the print to protect it from smudging or fading, especially if it will be exposed to outdoor elements. The final touch could also involve applying a protective coating or varnish for added durability and a glossy finish that makes your DTF prints stand out.