


Direct-to-film (DTF) transfer is a game-changing technique for artists and designers, allowing them to create custom designs on various surfaces. Choosing the right fabric, pre-washing, and preparing artwork with scalable vector formats are key steps for achieving high-quality DTF prints. The process involves digitally printing onto film, transferring it to the substrate, curing, and finishing to produce vibrant, durable results. Using specific file formats, resolutions, and transfer techniques ensures exceptional DTF print quality, catering to diverse creative needs.
“Unleash your creativity with personalized Direct-to-Film (DTF) designs! This comprehensive guide takes you on a journey from understanding the DTF transfer process to crafting unique art for printing. Learn how to choose the perfect materials and prepare your artwork for optimal results. From file formats to curing techniques, every step is laid out for successful DTF printing. Discover tips and tricks to create stunning DTF prints that bring your visions to life.”
- Understanding Direct-to-Film (DTF) Transfer: A Basic Overview
- Choosing the Right Materials for Your DTF Print Project
- Designing Custom Art for DTF Transfer: Tips and Techniques
- Preparing Your Artwork for Printing: File Format and Resolution Requirements
- The Step-by-Step Process of Applying a DTF Transfer
- Curing and Finishing Your DTF Prints: Achieving Optimal Results
Understanding Direct-to-Film (DTF) Transfer: A Basic Overview
Direct-to-film (DTF) transfer is a cutting-edge printing technique that has revolutionized the way we produce custom designs on various surfaces, from textiles to ceramics. This process involves transferring intricate patterns and images directly onto the desired medium using specialized equipment and inks. DTF offers unparalleled versatility, allowing artists and designers to create unique, high-quality prints without the need for complex set-up or traditional plate preparation.
At its core, DTF printing leverages a simple yet powerful concept: precise control over ink deposition. The process starts with a digitally printed image that is then aligned and transferred onto a film, which acts as an intermediate carrier. This film is subsequently pressed against the final substrate, enabling the ink to bond permanently. DTF’s appeal lies in its ability to handle complex designs, vibrant colors, and intricate details, making it a go-to method for creating personalized DTF prints that capture the essence of any creative vision.
Choosing the Right Materials for Your DTF Print Project
When embarking on a direct-to-film (DTF) print project, selecting the suitable materials is a pivotal step that significantly influences the final outcome. The right choice ensures your DTF transfer and prints turn out vibrant, durable, and of high quality. Key considerations include fabric type—whether it’s cotton, polyester, or a blend—as each material has unique properties affecting ink adhesion and print longevity.
For optimal results, opt for materials with a smooth surface to facilitate even ink distribution and prevent smudging. Additionally, consider the weight of the fabric; heavier fabrics provide more stability during printing, reducing the risk of warping or stretching. Moreover, pre-washing new garments is recommended to remove any finishes or treatments that could interfere with the DTF printing process, guaranteeing a crisp, professional print.
Designing Custom Art for DTF Transfer: Tips and Techniques

When creating custom art for a DTF (Direct-to-Film) transfer, the key is to understand that this process involves transferring designs onto various materials, such as fabric or wood, using a thin film and heat. Start by sketching your design freely, allowing creativity to flow. Once you have a rough idea, digitize it using graphic design software, ensuring the lines are clean and crisp. This step is crucial for achieving precise DTF prints.
Consider the material you plan to apply the transfer to when designing. For instance, fine details might be lost on coarse surfaces, so adjust your design accordingly. Use vector graphics whenever possible as they scale better without pixelation. Play with colors and opacity levels; a subtle gradient can add depth to your DTF prints. Remember, the goal is to create an eye-catching, high-quality design that translates well onto the chosen surface, making your DTF transfer stand out.
Preparing Your Artwork for Printing: File Format and Resolution Requirements
When preparing your artwork for a direct-to-film (DTF) transfer, it’s crucial to ensure your files meet the specific requirements for DTF printing. The primary focus here is on file format and resolution. For optimal results, designs should be saved in vector formats like SVG, EPS, or AI. These formats allow for scalability without losing image quality, which is essential for intricate details and sharp lines that DTF prints demand.
Resolution is another critical aspect. Aim for a minimum of 300 DPI (dots per inch) for your artwork. This ensures that the final printed product will have crisp, clear details. Keep in mind that higher resolutions are generally better, especially for complex designs with fine lines or text. Formats and resolutions that align with these guidelines will facilitate a seamless DTF transfer process, ultimately yielding high-quality DTF prints.
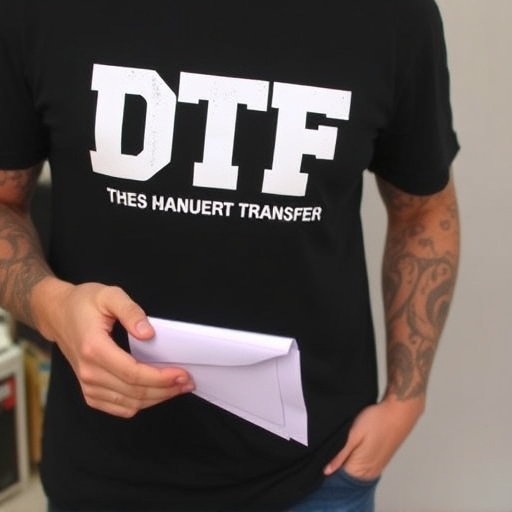
The Step-by-Step Process of Applying a DTF Transfer
Creating personalized direct-to-film (DTF) designs involves a precise, step-by-step process that ensures high-quality prints. It starts with preparing your design file, ensuring it meets the specific requirements for DTF printing, such as resolution and color mode. The image should be optimized for direct application to the film surface.
Next, you’ll need to print the design onto a transparent film using a compatible printer. After printing, carefully remove the film from the paper backing. This is where the magic happens: apply the DTF transfer solution to both sides of the film, allowing it to adhere temporarily. Position your design precisely on the desired surface, ensuring no air bubbles are trapped between the film and the substrate. Heat the film gently but evenly to fuse the print onto the material, resulting in vibrant and long-lasting DTF prints.
Curing and Finishing Your DTF Prints: Achieving Optimal Results
After applying your DTF transfer and printing your designs, the next crucial step is curing and finishing. Curing ensures that the ink fully fuses with the substrate material, making the prints durable and long-lasting. This process often involves heat application, either through a press or an oven, to activate the adhesive properties of the ink. The temperature and duration will depend on the specific DTF product you’ve used, so always follow the manufacturer’s guidelines for optimal results.
Finishing touches include trimming excess transfer material around the print edge and cleaning any residue. This step enhances the overall presentation of your DTF prints. Consider using precision tools like scissors or a craft knife to achieve clean lines. Additionally, a quick wipe down with a damp cloth can remove any smudges or marks, revealing vibrant, high-quality DTF prints that are ready to be showcased or incorporated into various projects.